Properties
Properties
Section titled “Properties”Properties are the foundation of Qivuli. Each property can have multiple units, tenants, leases, and its own configuration.
Create your first property
Section titled “Create your first property”After completing your account setup, add as many properties as you want from the dashboard:
- Click “Add Property” from the main dashboard
- Fill in the basic information (name, type, address)
- Click “Create Property”
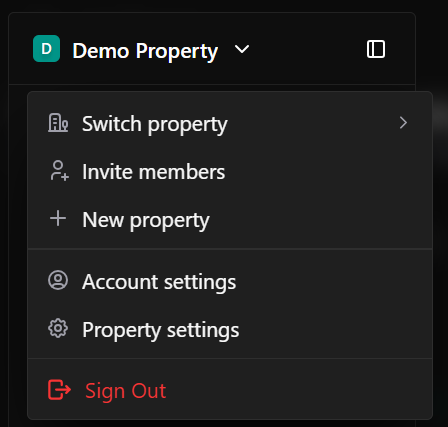
When you open a property, click on the property name you’ll see a dropdown with all management sections to access the property section, click on the account settings or property settings to access the property sidebar . Here’s what each section does:
Preferences
Section titled “Preferences”Interface & Theme
Section titled “Interface & Theme”Customize how Qivuli looks and behaves for this property:
| Setting | Options |
|---|---|
| Theme | Light / Dark / System default |
| Theme Color | Dashboard / Tenants / Leases / Payments |
User Profile
Section titled “User Profile”Manage your personal account settings across all properties:
| Field | Description |
|---|---|
| Full name | Your display name throughout the system |
| Email address | Used for login and notifications |
| Profile photo | Upload a profile picture |
Administration
Section titled “Administration”System-level settings (available to property owners and admins):
- General property settings
- Mpesa settings
- Manage Members
- Create roles and permissions
Property Settings
Section titled “Property Settings”General
Section titled “General”Property Logo
Section titled “Property Logo”Your logo appears on the property .
- Supported formats: PNG, JPG, SVG (transparent background recommended)
- Recommended size: 400 x 100 pixels
- Max file size: 2MB
Property Name
Section titled “Property Name”The official name of this property as it appears throughout the system.
Example: “Sunset Heights”, “Downtown Commercial Plaza”, “Beachfront Villas”
Currency
Section titled “Currency”Select the currency for all financial transactions at this property.
- Kenyan Shilling (KES) — Default for Kenya
- US Dollar (USD)
- Euro (EUR)
- Pound Sterling (GBP)
Note: Currency cannot be changed after the first lease is created.
Date Format
Section titled “Date Format”Choose how dates appear throughout this property:
| Format | Example |
|---|---|
| Apr 7, 2026 | Month DD, YYYY |
| 07/04/2026 | DD/MM/YYYY |
| 04/07/2026 | MM/DD/YYYY |
| 2026-04-07 | YYYY-MM-DD |
Email Addresses
Section titled “Email Addresses”Add email addresses associated with this property:
- Primary email — Main contact for tenants
- Billing email — For invoices and receipts
- Support email — Tenant support requests
- Additional emails — Team members, accountants
Phone Numbers
Section titled “Phone Numbers”Add phone numbers for this property with country codes:
| Country | Code | Example |
|---|---|---|
| Kenya | +254 | +254 712 345 678 |
| USA | +1 | +1 (555) 123-4567 |
| UK | +44 | +44 20 7123 4567 |
Phone settings image here
Danger Zone
Section titled “Danger Zone”This action permanently deletes the property and all associated data (tenants, leases, payments, documents). This cannot be undone.
M-Pesa Settings
Section titled “M-Pesa Settings”Configure M-Pesa integration for automated rent collection and payment reconciliation.
Setup Instructions
Section titled “Setup Instructions”- Enable M-Pesa — Toggle on M-Pesa payments for this property
- Enter Paybill/Till Number — Your registered M-Pesa business number
- API Credentials — Enter your Consumer Key and Consumer Secret from the M-Pesa developer portal
- Passkey — Your M-Pesa API passkey
- Test Connection — Verify the integration is working
What M-Pesa integration enables
Section titled “What M-Pesa integration enables”- Automatic payment reconciliation from M-Pesa statements
- Real-time payment notifications
- Tenants can pay rent via Paybill/Till number
- Automatic matching of payments to tenants
- Daily, weekly, or monthly settlement reports
Members
Section titled “Members”Invite team members to collaborate on this property.
Inviting members
Section titled “Inviting members”- Click “Invite Member”
- Enter their email address
- Select their role (Admin, Manager, Viewer, Custom)
- Send invitation
Member roles
Section titled “Member roles”| Role | Permissions |
|---|---|
| Owner | Full access — can delete property, manage billing, invite/remove members |
| Admin | Full access except billing and property deletion |
| Manager | Can manage tenants, leases, payments, and view reports |
| Viewer | Read-only access to all data |
| Custom | Permissions defined in Roles & Permissions |
Roles & Permissions
Section titled “Roles & Permissions”Create custom roles with granular permissions for team members.
Default roles cannot be edited
Section titled “Default roles cannot be edited”- Owner
Create custom role
Section titled “Create custom role”- Click “Create Role”
- Enter role name (e.g., “Maintenance Coordinator”, “Accountant”)
- Toggle permissions on/off:
| Permission Category | Options |
|---|---|
| Properties | View, Edit, Delete, Create |
| Tenants | View, Edit, Delete, Create, Contact |
| Leases | View, Edit, Delete, Create, Sign |
| Payments | View, Record, Delete, Export |
| Invoices | View, Create, Send, Delete |
| Expenses | View, Record, Delete |
| Reports | View, Export |
| Settings | View, Edit |
Overview
Section titled “Overview”Each tier purchased includes a specific number of SMS, email, and WhatsApp messages. Once your allocated messages are depleted, you can easily top up by pressing the “Top Up Credits” button and choosing between M-Pesa STK Push or Paybill (manual).
STK Push Top Up
1. Enter your phone number
2. Enter the amount you need
3. Enter M-Pesa PIN from your phone
Instant credit addition ✓
Paybill (Manual)
Alternative top-up method via Paybill number
Credits by Channel
Section titled “Credits by Channel”| Channel | Included per tier | Top up available |
|---|---|---|
| SMS | X messages | Pay-as-you-go |
| X emails | Pay-as-you-go | |
| X messages | Pay-as-you-go |
SMS
X / Y messages remaining
Top up when depleted via STK Push or Paybill
X / Y emails remaining
Top up when depleted via STK Push or Paybill
X / Y messages remaining
Top up when depleted via STK Push or Paybill
Template Variables
Section titled “Template Variables”Create your own message templates using these variables:
Tenant Variables
{{tenant_name}}{{tenant_phone}}{{tenant_email}}
Payment Variables
{{amount_due}}{{amount_paid}}{{due_date}}{{receipt_number}}
Property Variables
{{property_name}}{{unit_number}}
Example template:
Hello {{tenant_name}}, rent of {{amount_due}} for {{unit_number}} at {{property_name}} is due on {{due_date}}.
Templates page image here